

Welcome to another edition of Weekend Crafting! Today I'm sharing another craft project from The Christmas Book by Ortho Books...Sheet Music Ornaments. (please excuse the poor quality of the images again...had to take pictures with my phone from the book)
Just a reminder: Christmas movies are playing on the Hallmark Channel all weekend. Click HERE to visit my post with the schedule. There is also an update on the dates for the QVC Christmas in July special.
Sheet Music Ornaments
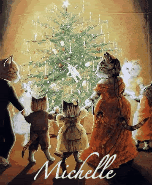
In the book, the author states that this craft was inspired by this Christmas tree display...

Keep in mind that you can make variations by selecting alternatives to the materials shown here. Edge trim and ribbon ties can be in any color or any material, such as wrapping paper or fabric. All kinds of fresh or artificial foliage can be used to decorate the scrolled sheet music. Or, attach differently shaped ornaments (consider miniature musical instruments) Pg. 72

1. Sheet music can be purchased or taken from songbooks you have on hand. You also need black construction paper (or opaque, colored adhesive tape), a straightedge, a craft knife, glue, assorted ribbon, foliage, and hat pins.
2. The sheet music looks attractive when given a finished edge. From the black construction paper, cut strips to the desired size (approximately 1/4 to 3/4 inch in width, and long enough to reach at least two thirds of the way across the top and bottom of the sheet). To ensure clean edges, cut paper with a straightedge and craft knife, rather than with scissors.

3. Glue lengths of black paper trim to the top and bottom edges of the sheet. Allow glue to dry thoroughly. If you prefer, use colored or patterned adhesive tape. This eliminates the need to cut and paste strips of paper.

4. Roll sheet into a scroll, beginning at an edge not covered by the black border.

5. Using a square knot, firmly tie a length of ribbon into a bow to keep the cylinder rolled up.

6. Using ribbon in a contrasting color, attach foliage, a bell-shaped ornament, or other decorations of your choice. Secure wherever necessary with a hat pin pushed through the sheet or with a straight pin with a colored head.

7. Trim the ends of the ribbon into a notched or other decorative pattern.

8. To suspend the ornaments rather than resting them on branches, add a hook.
Enjoy!
Always in spirit....
This looks so easy, pretty, and classy.
ReplyDeleteLove these ornaments! They would look great on my Living Room Tree!
ReplyDeleteThanks so much for sharing!
Hugs,
Deb