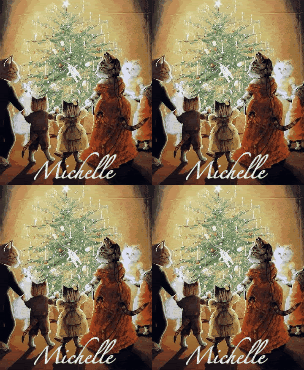
You all know that books are my life. If you don't...well, now you do. *wink* I posted about these repurposed Christmas card bookmarks and wrapping paper bookmarks several years ago and I thought it was time to share them again. I really need to get my butt busy this season and make me some. I think they would be great gifts for readers too, especially those who like holiday reads.
Make a Sparkly New Bookmark
Holiday cards come with pretty landscapes, lacy snowflakes, and sparkly details that are too lovely to throw away. Cutting cards down to the size of a 6" ruler, then adding a tassel, readily turns greeting cards into bookmarks. The following are complete directions on how to make a personalized bookmark:
Many Materials, Many Uses for a Bookmark
Made from stiff paper, card stock, cardboard and even old Christmas cards, these bookmarks are more than just handsome. They are also customized and good for the environment. Personal bookmarks also make a great gift; to thank a teacher, honor a relative, or show a special friend that their good reading habits are appreciated.
Custom Bookmarks Start Off with Paper or Board
A few other materials are needed as well:
•1 piece of stiff paper, cardboard, scrapbook paper or heavyweight stock (or an old greeting card)
•1 piece of ribbon, length of embroidery string, or purchased tassel
•1 single hole-punch tool and scissor
•1 or more felt-tip markers (optional)
•1 sheet of decorative stickers (optional)
•1 bead or charm (optional)
•1 decorative metal brad (optional)
•1 sheet of contact paper, clear or with a design
Directions for Making Personalized Bookmarks
1.Measure and cut the paper, board or stock to a size that is 1.5" wide and 6" long.
2.If the board/card does not have a design, decorate it now. Use markers or stickers to add pictures and/or words. Or cover the board with stickers, or contact paper that has a design on it.
3.Using the hole-punch, make a hole in the top of the bookmark, about 3/4" from the edge.
4.Insert a a tassel, piece of ribbon or string with a bead/charm on it, into the hole. A decorative brad (large paper fastener) can also be used. Secure by tying, looping or spreading the ends of the metal brad.
5.Once the bookmark is complete, it may be covered with clear contact paper, or laminate, to keep it stiff and clean.
Adding Tassels and Finishings to Bookmarks
It is easy to make tassels by wrapping a length of yarn around the hand, about 10 times. Remove from the hand and then tie one end of the string around the long oval. Then cut across the bottom with a scissor. Instead of making tassels, ones can be purchased (try craft and hobby stores like Michael's or AC Moore, or even online at California Paper Goods).
Decorative brads, which look like pretty buttons on the front and have paper-fastener ends in the back, can also be purchased from craft stores and sites. They are another nice way to finish off the bookmark. Try ribbons and cord, too, matching the colors to the papers. Whatever additions are made will help the bookmark show out of the book.
Making this simple craft is a great way to entertain kids. It is also ideal way to personalize books and keep textbooks free of bends and rips. Personalized bookmarks also make a great gift.
Make a Bookmark
Sometimes when we wrap presents, there are always scraps of wrapping paper left over that are usually large enough that we don't want to throw them away, but too small to wrap anything but the smallest of presents. Well, here's a simple craft project to put those scraps to use. Here is all you have to do:
- Cut a rectangle from an old cereal box and glue on the wrap. Punch a hole about a quarter of an inch from the top and insert a ribbon of your choice. This craft will work great for Christmas-themed bookmarks or for other occasions using birthday or all occasion wrapping paper. I can't wait to try it!
From MarthaStewart.com
This post is part of .....


Oh, I should definitely make some of these!
ReplyDeleteI know! I'm really going to hunker down and make some this year. :)
Delete